|
|
本来想发在2楼,但是没整明白附件怎么插入。。。
下面是一个老外的教程,我翻译了
原文:http://www.sc2mod.com/board/index.php?page=Thread&postID=2038
原作者:Ivion
如果以后有更好的,我再换
1Introduction:
What is a terrain object? : A terrain object is an object which is integrated into the terrain of your map. This way, your units will be able to walk or build over it.
In this tutorial, I'll show you how to make a walkable bridge using a terrain object.
简介
啥是地形物体啊?一个地形物体就是同你的地图的地形融合的物体。这样你的单位就可以走过去鸟。
在教程中,我会展示给你怎么玩转它。
我自己说:其实WE也有啊,就是桥,斜坡之类的。但是GE的这个部分单独拿出来,你就明白暴雪想把这个整的开放,可修改。到时候会超越桥的功能。
2Mar Sara Bridge tutorial:
Mar Sara 桥教程
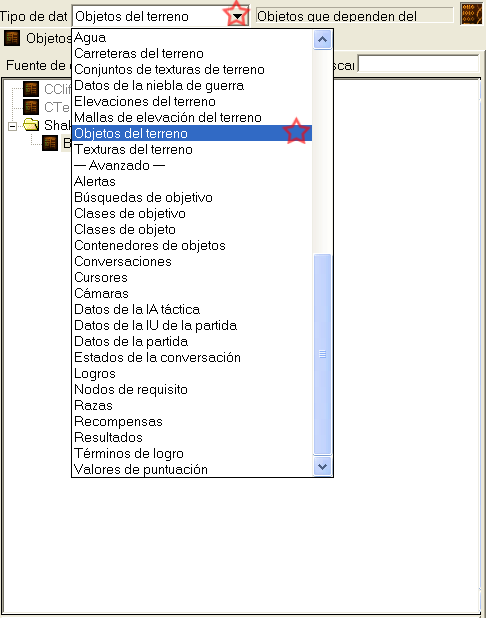
1 Open your data editor and select the "Terrain Objects" tab.
首先打开数据编辑器,选择地形物体版
PS截图是西语!一看见单词后面那个O我就想起苏克雷又黑又圆的头。。。暴雪说,一部分人先玩GE,一部分人后玩。。。
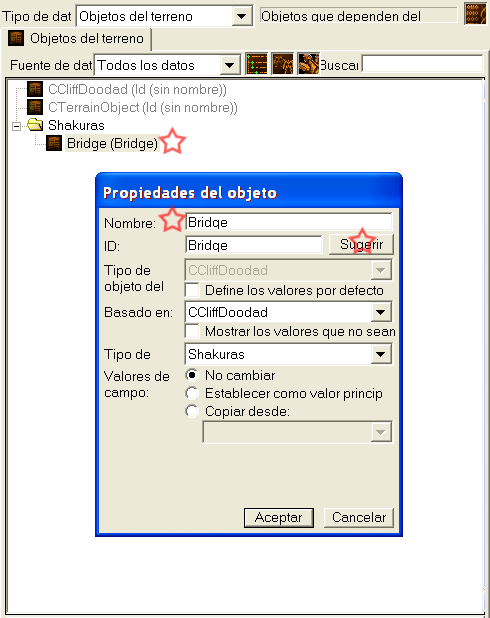
2.- Create a new Object
建立新的物体
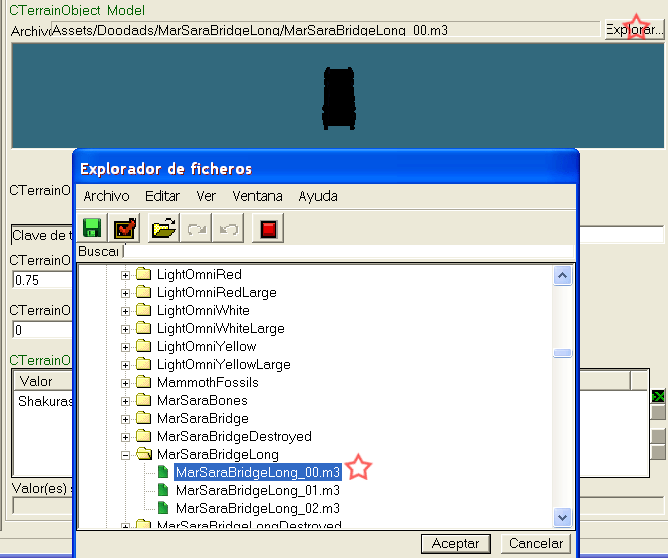
3.- Select the "MarSaraBridgeLong_00.m3" model for your object.
选择MarSaraBridgeLong_00.m3作为这个物体的模型
4.- Now let's set the size for our terrain object. You should take care at this point. You have to select the right size for your model. Otherwise, if your values are too low, your model won't show up. In this example, the right values are CCliffDoodad_NumCellsAcross = 9, and CCliffDoodad_NumCellsDown = 27.
现在让我们给地形物体选择合适的大小。这点你们可得上心啊。要选对的,否则你会看不见你的物体
这里的 CCliffDoodad_NumCellsAcross = 9
同时 CCliffDoodad_NumCellsDown = 27
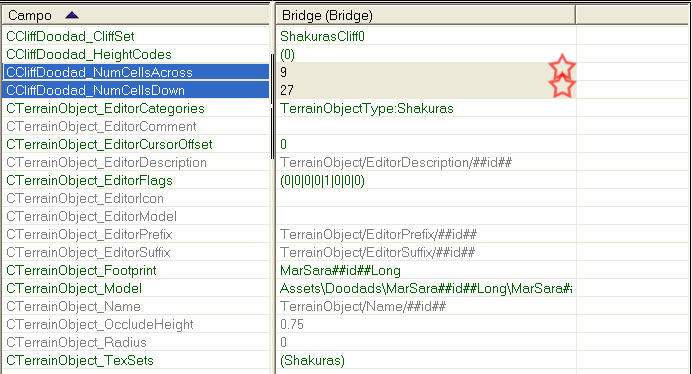
PS跨越格数。。下面格数。。
这些数据等以后我们会明白的
5.- Select the cliff set where you will like to use your terrain object. Next, select the height code for your terrain object. The height codes are a capital letter which identify the different cliff height levels (A, B, C, D, ...). A is the lowest cliff height level, B is the 2nd cliff height level, and so on.
选择那个悬崖组你想应用你的物体,然后选择高度代码。高度代码是ASCD,A最低,D最高

PS,A最小,D最大,这个。。。。这个。。。。
6.- Open the "Footprints" tab and create a new Footprint for the MarSaraBridgeLong
打开脚印面板,创建一个新脚印
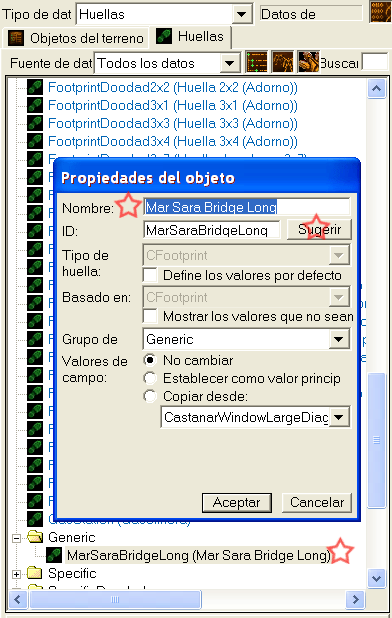
PS英语高手告诉我PATH和FOOTPRINT哪个是路径
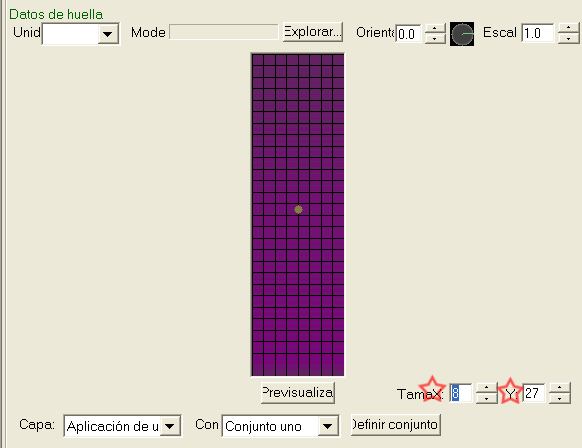
7.- First, we have to set the footprint size for our model. For the MarSaraBridgeLong, set this to (8;27)
首先设定脚印的大小。我们这例,选(8:27)
PS:这个图。。可以管他叫WE的路径编辑器
8.- You can customize some special options for your footprint: (buildable / creepable / ...). You should look for a footprint guide to learn about it.
你可以设定不同的脚印类别:
可建造的,可移动的。你最好看看脚印指导。
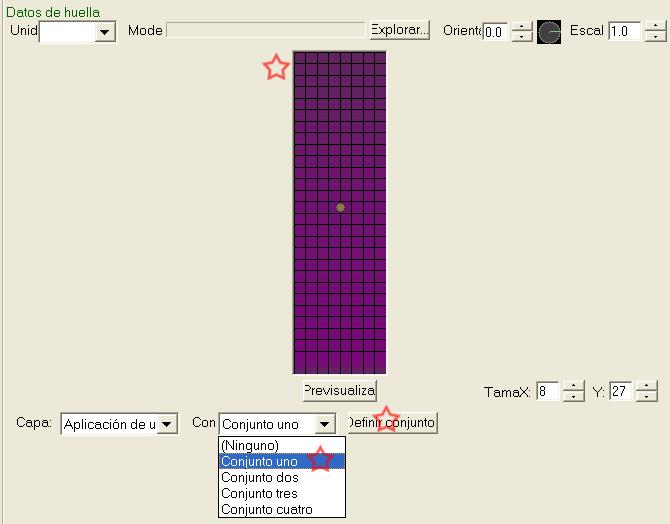
PS:有这东西?待会看看。
9.- Select the "Path Drawing" tab. Here you can draw the walkable areas for your footprint. Fill the grid as in the picture, so your units can walk along the bridge. Also select the "Persistent" type bellow.
选择绘制路径面板,给你的脚印绘制可通行地区。照我这么画。还得在下面选择“持续”类型。
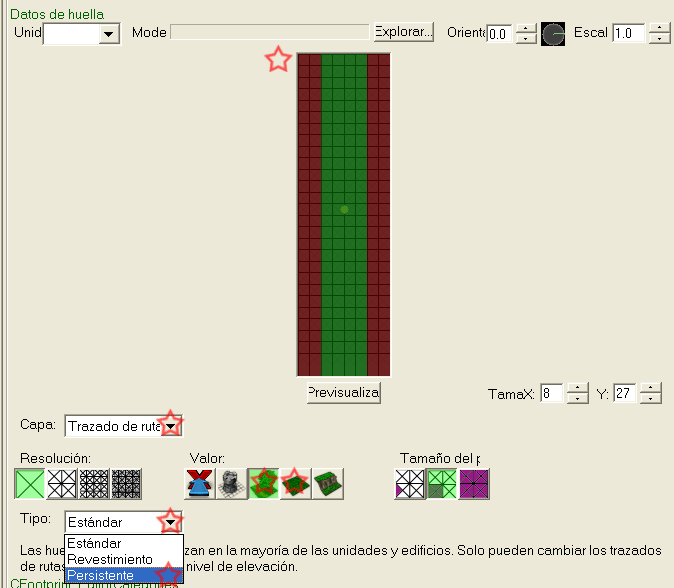
10.- Come back to the "Terrain Objects" editor and select the footprint for your Object.
回到地形物体面板,为你的物体选择脚印
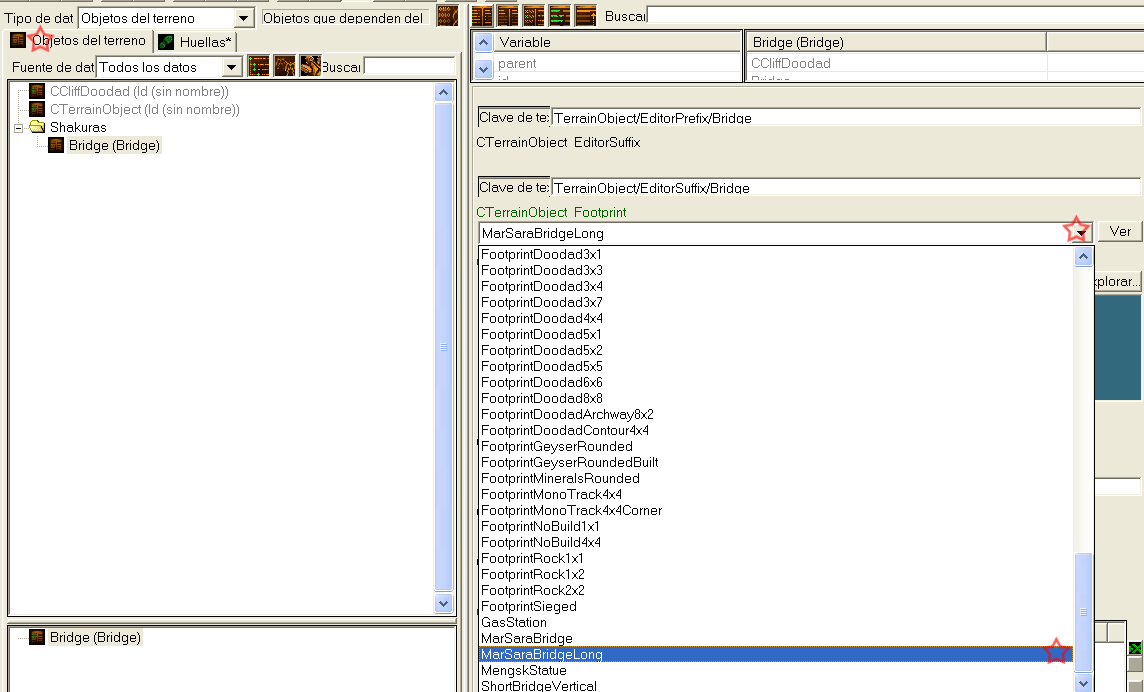
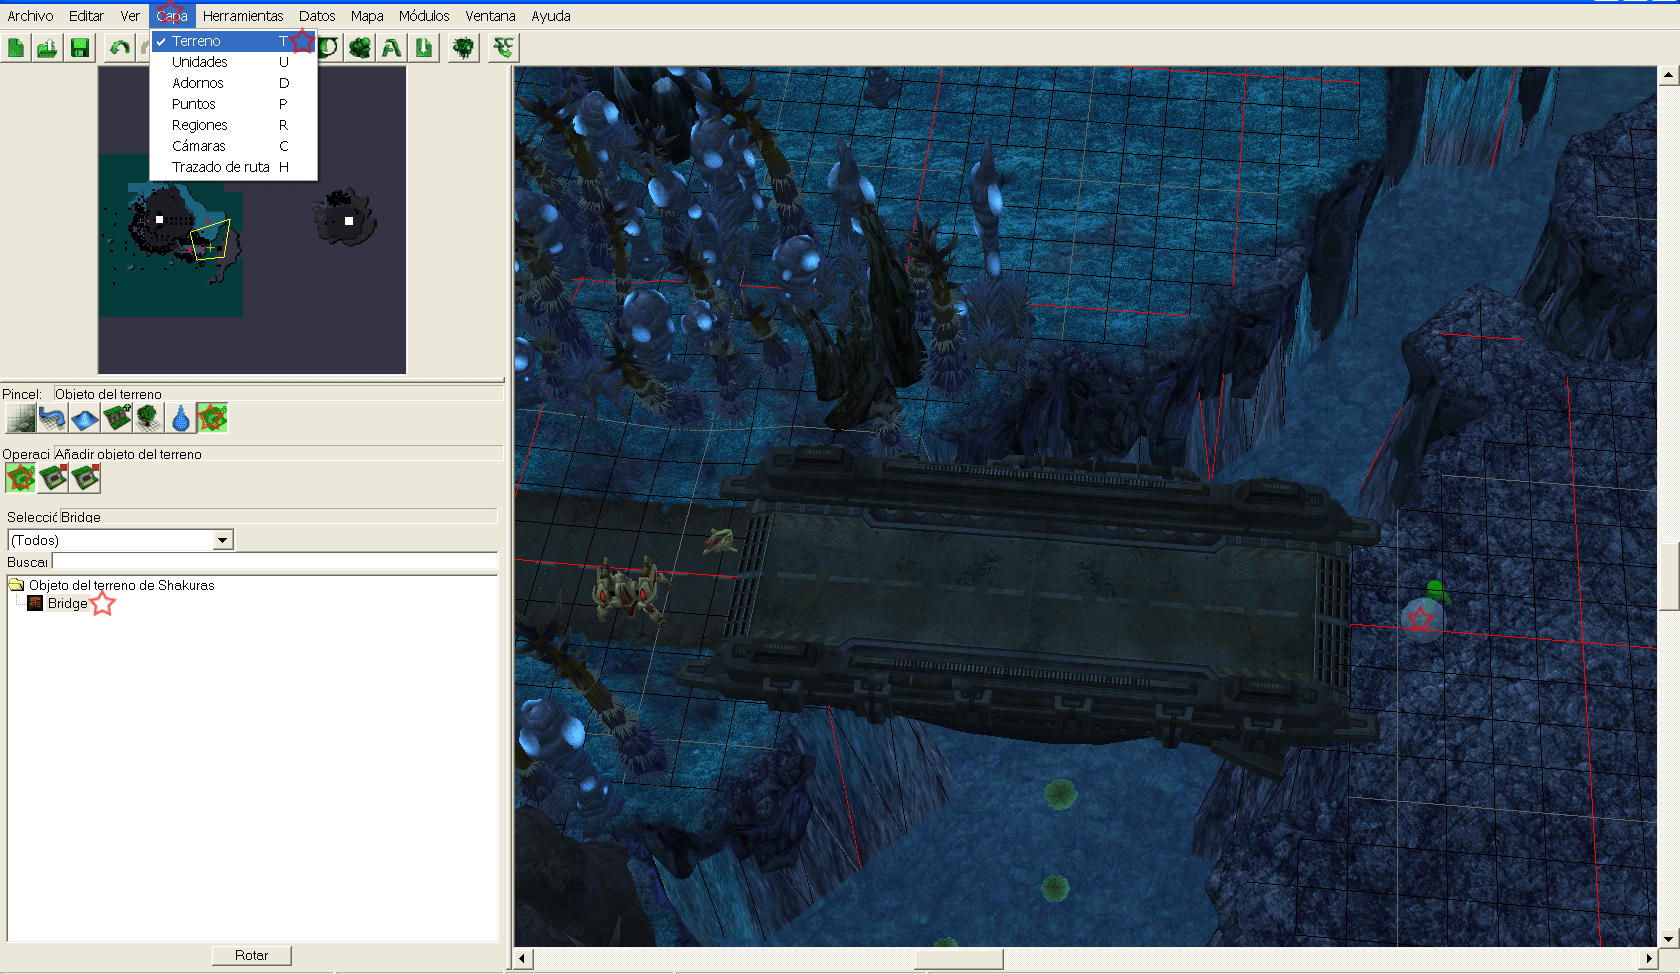
11.- Now let's put the bridge in our map. Go to the terrain editor. Check the "Terrain Object" button and place the Bridge in your map.
终于可以放置物体了
地形面板》地形子面板》放置物体子子面板
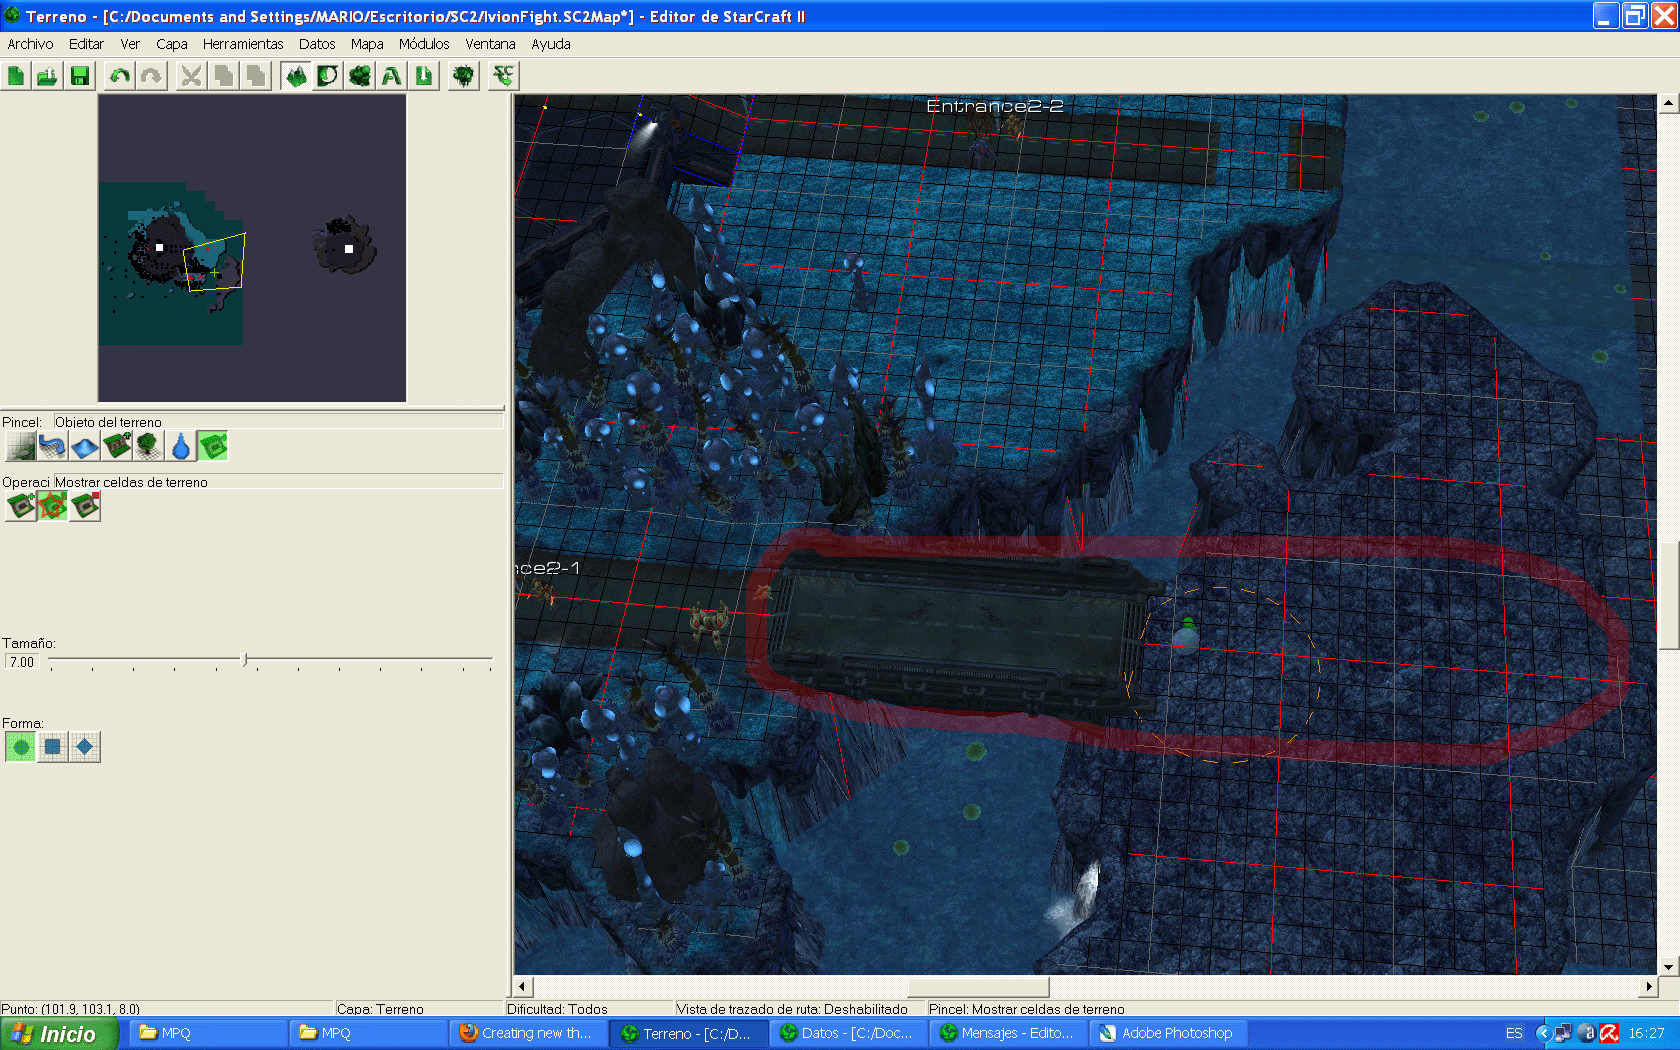
12.- When you place a terrain object, it'll remove all the surrounding terrain. So you have to select the "Show terrain cells" tool and paint all the surrounding area. This way your will restore your terrain.
当你放置一个地形物体,它会把周围的纹理设为隐藏,你可以自己把它改回来。旁边的那个显示地形工具。
Note that the terrain objects will destroy your cliffs. You should add some doodads to obtain a better appearance.
由于地形物体会破坏悬崖,要放点装饰弥补一下。
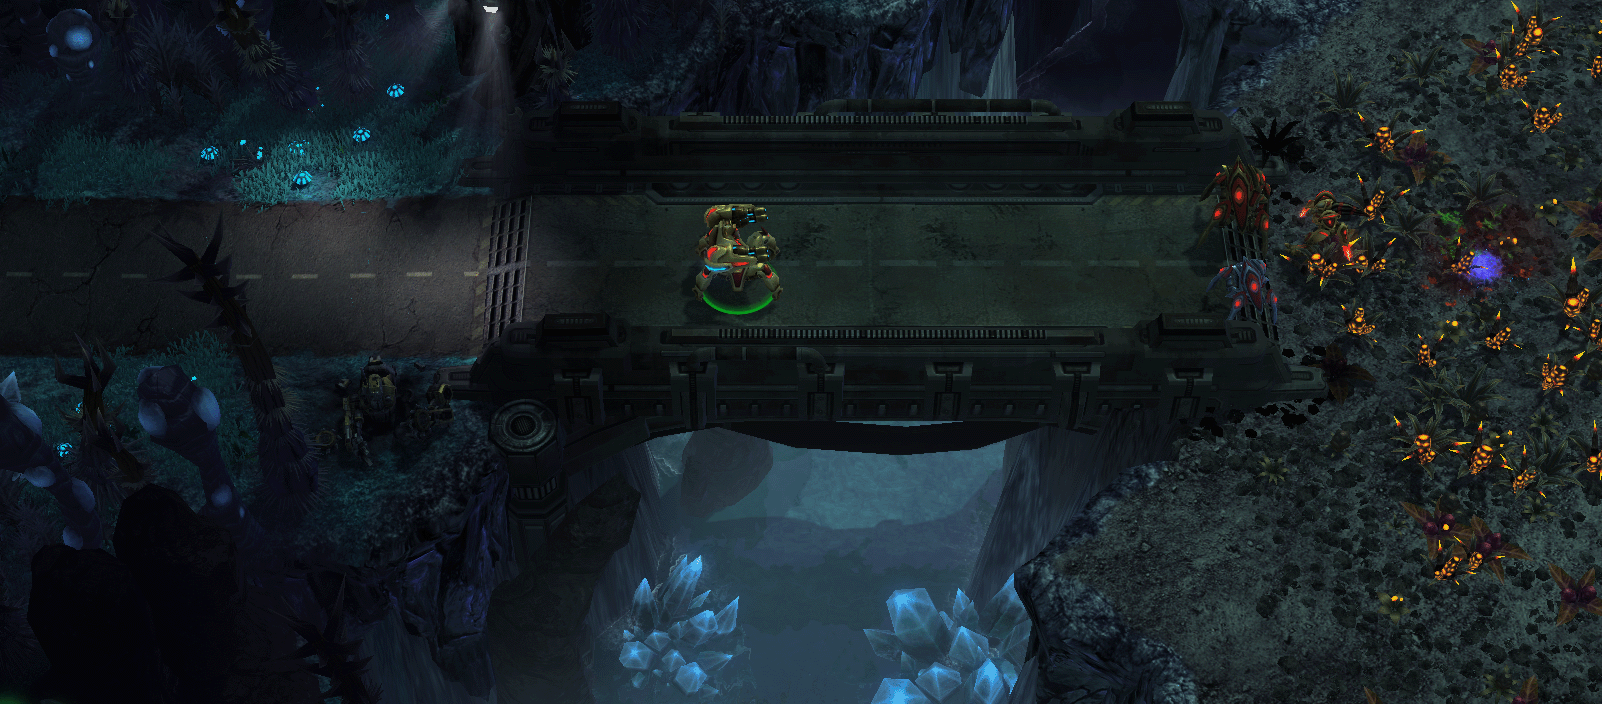
PPS:这个教程没有解释,属于无废话教程。先发上来。
|
-
评分
-
查看全部评分
|